
Radiator thermostats regulate themselves using an integrated temperature sensor. If you set the temperature to about 21 °C, the valve opens until the temperature is reached. Unfortunately, the temperature sensor is located right next to the heater and although you can usually set a deviation, an external temperature sensor is often more useful. After all, this can be placed exactly where the set temperature should also be reached. Unfortunately, HomeKit does not yet offer the option to select a different temperature sensor. That’s why we’ll show you today how you can still use any HomeKit temperature sensor via two automations.
We implement the whole thing in such a way that the schedules described in this Automation of the Week and also the presence detection still take effect. Before we start with the actual automations, we define some basic conditions. To prevent the heater from constantly opening and closing the valve, we do not opt for a fixed desired temperature, but for a temperature range between 21 and 22 °C. If this temperature range is exceeded, we set the temperature of the radiator thermostat to 18.5 °C. For the schedules and presence detection to continue to work, this value must be different from the lower temperature limit from this automation of the week. If our desired temperature range is undershot, we set the thermostat to 24 °C. This ensures that the thermostat maintains our desired temperature range regardless of our own measured temperature. We change the target temperature in our schedules and presence detection from 22 °C to 24 °C.
Switch on the heating using the temperature sensor
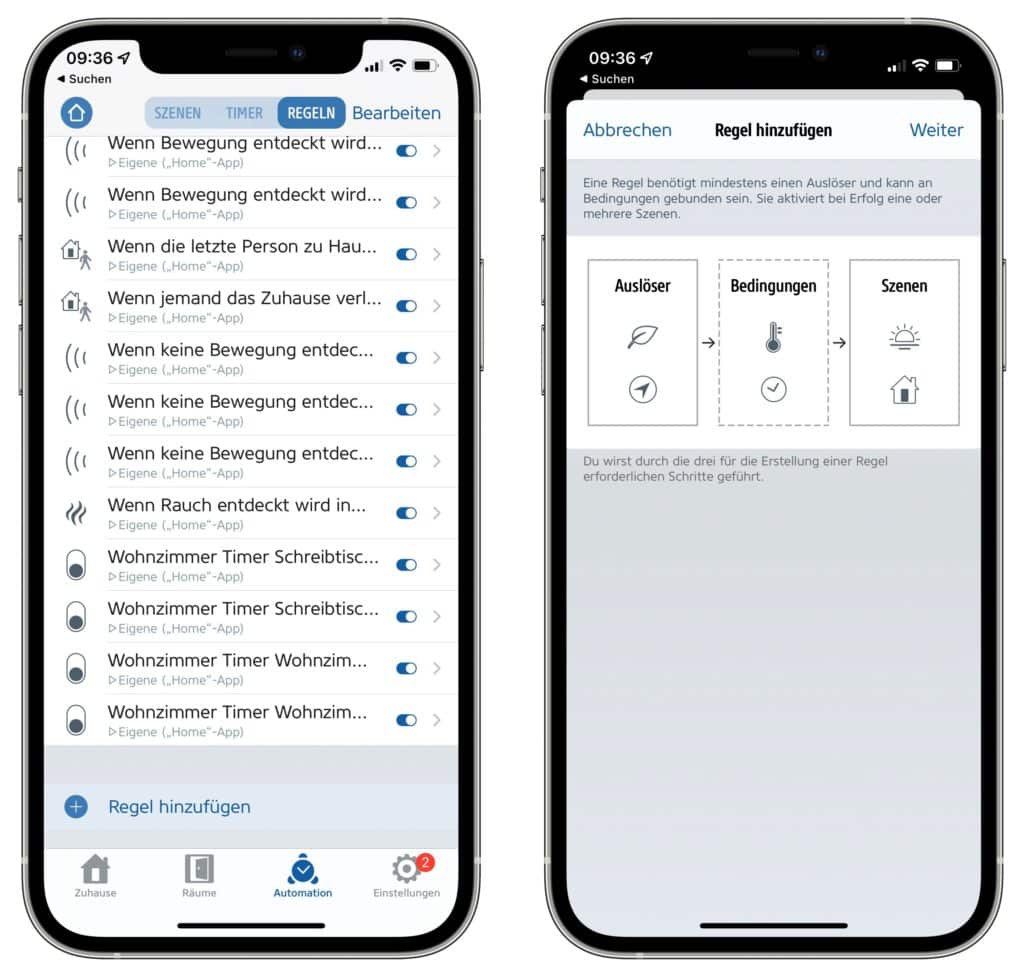
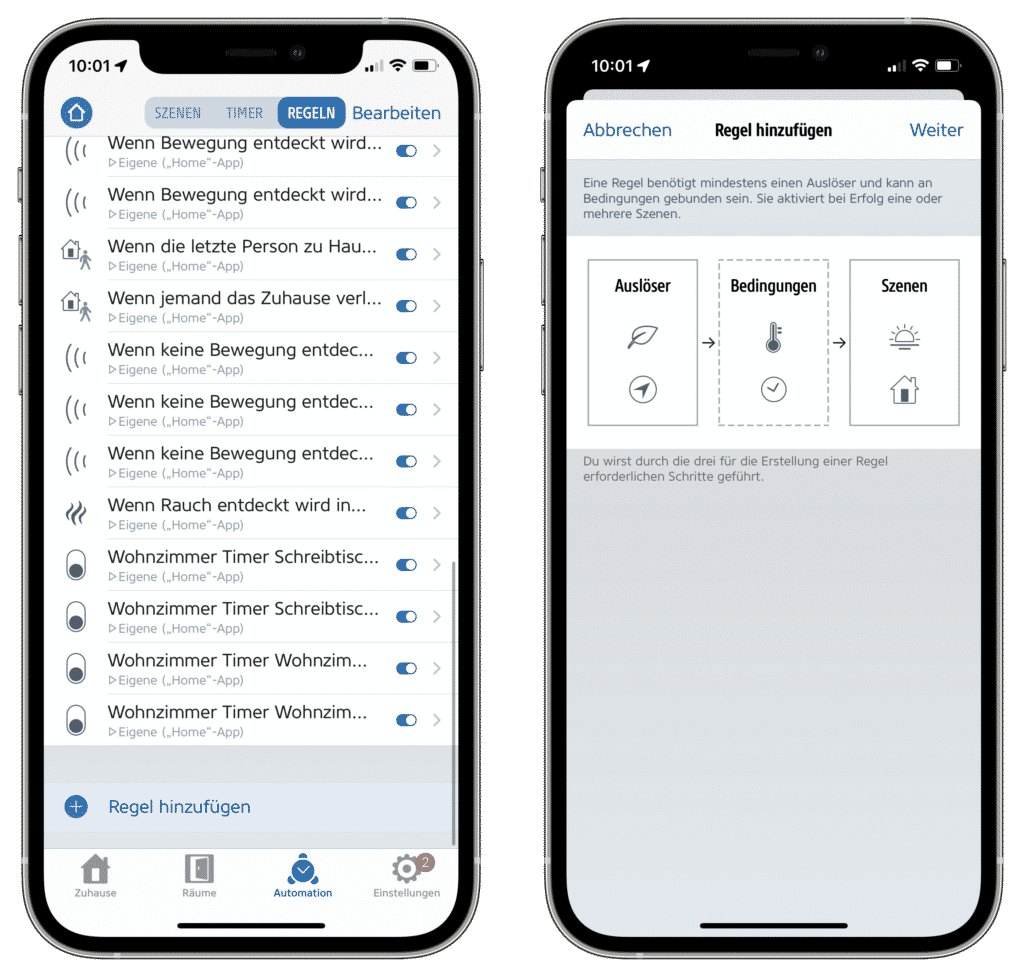
So let’s start with the first HomeKit automation. Since we’ll be using conditions to keep schedules and presence detection working, we’re not creating the automation through Apple’ s Home app, but through Eve Systems’ free HomeKit app. To do this, we switch to “Automations” in the app, then to the “Rules” tab and then go to “Add rule” at the very bottom.
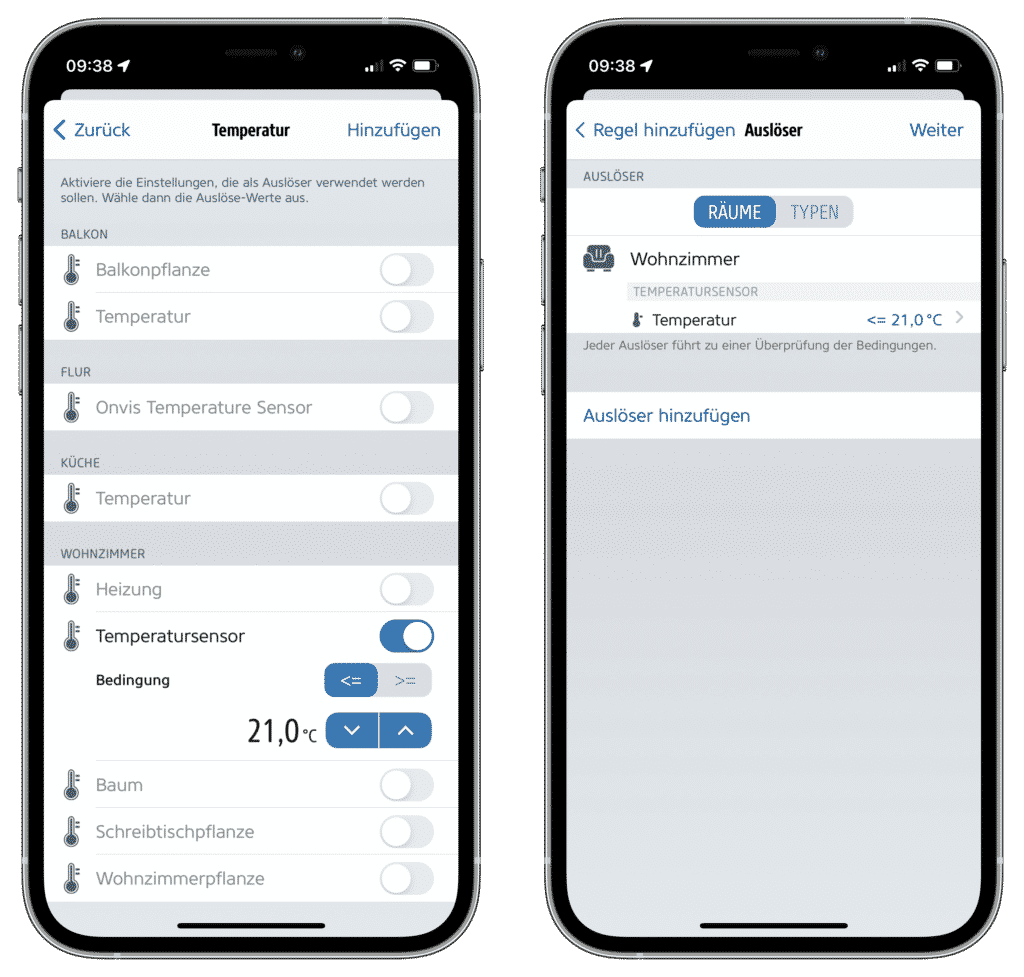
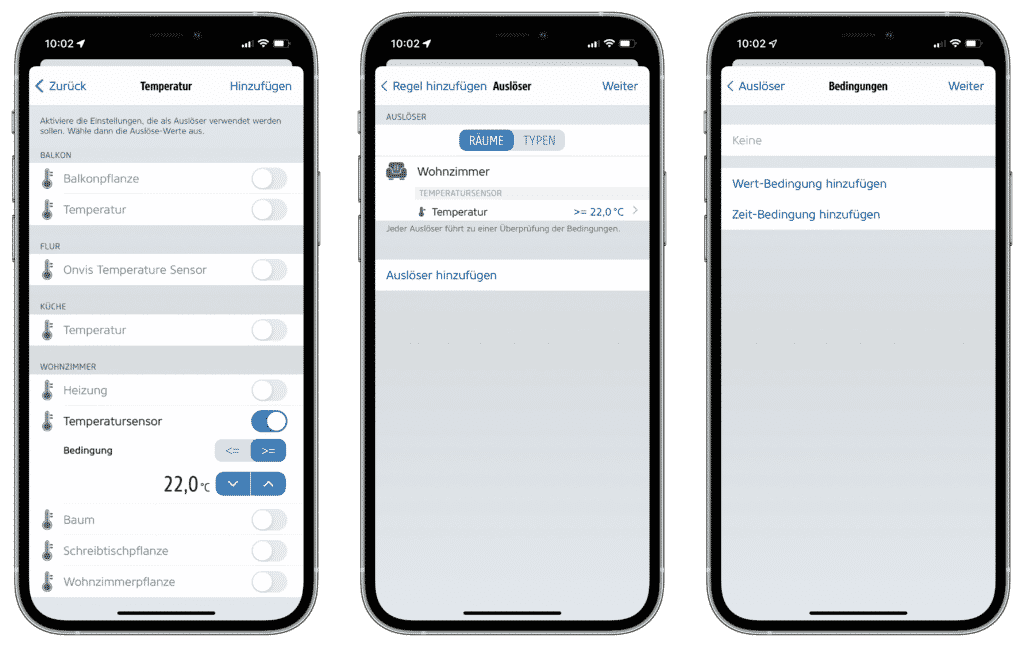
We use the external temperature sensor as a trigger, more precisely, as soon as it falls below 21 °C.
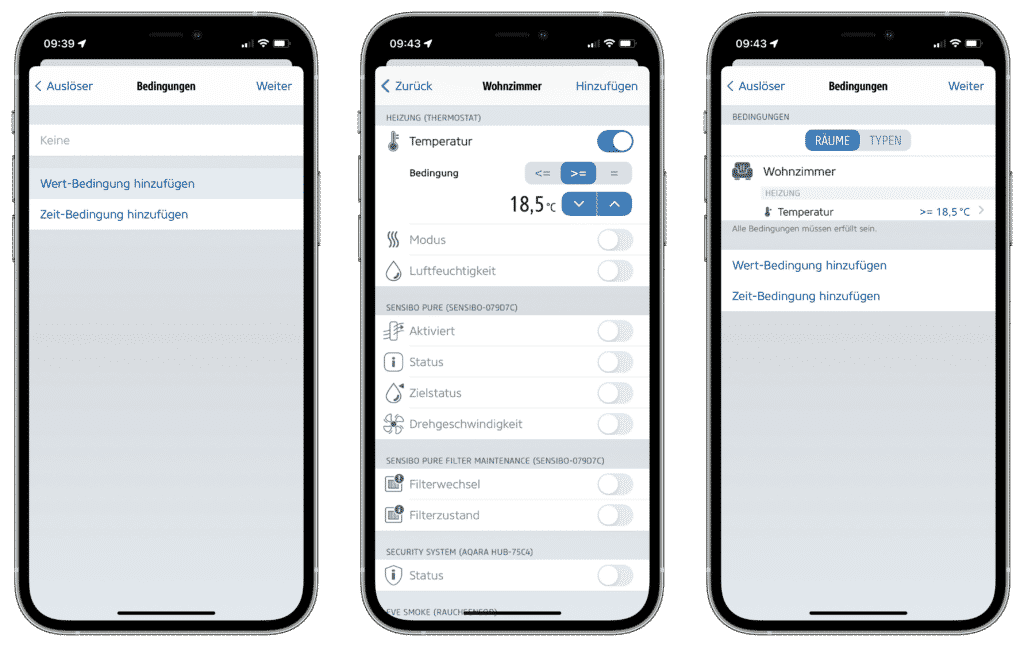
As “value condition” we use the set value of our heater. This should be >= 18.5 °C, which is at least the value we set when our desired temperature range is exceeded. If the set temperature is lower than that, the schedule or presence detection takes effect, because in it we set the temperature to 18 °C at night or when we are absent, and in that case we do not want to turn on the heating.
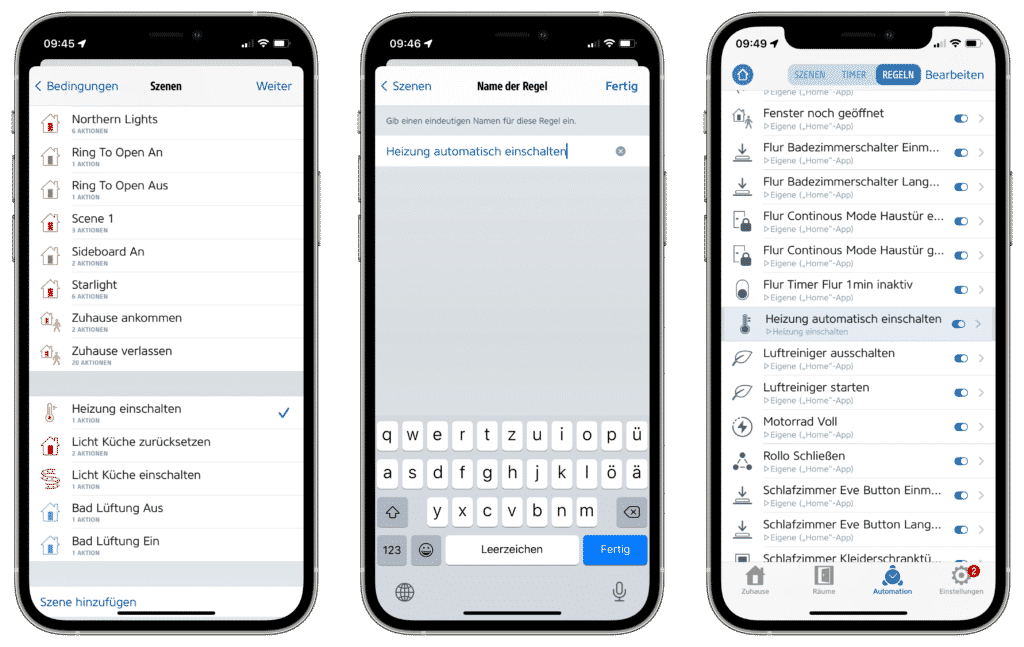
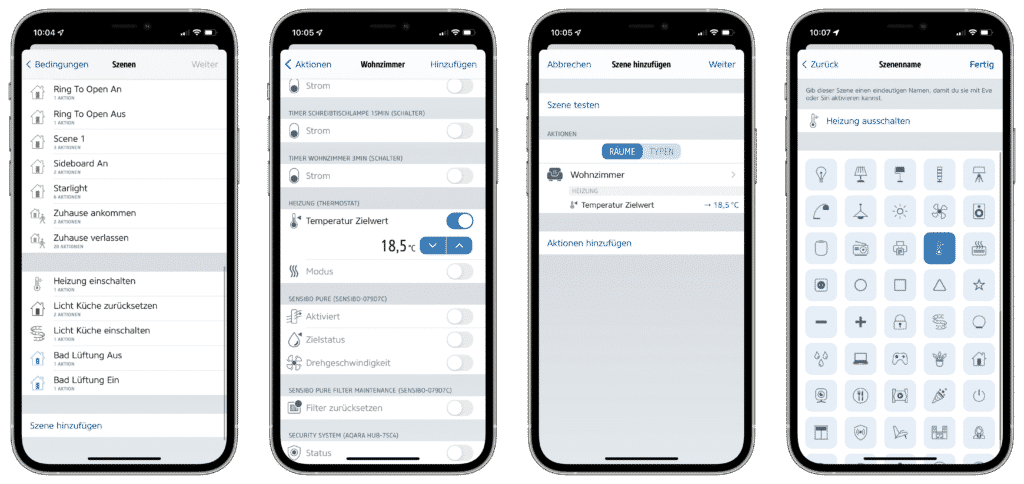
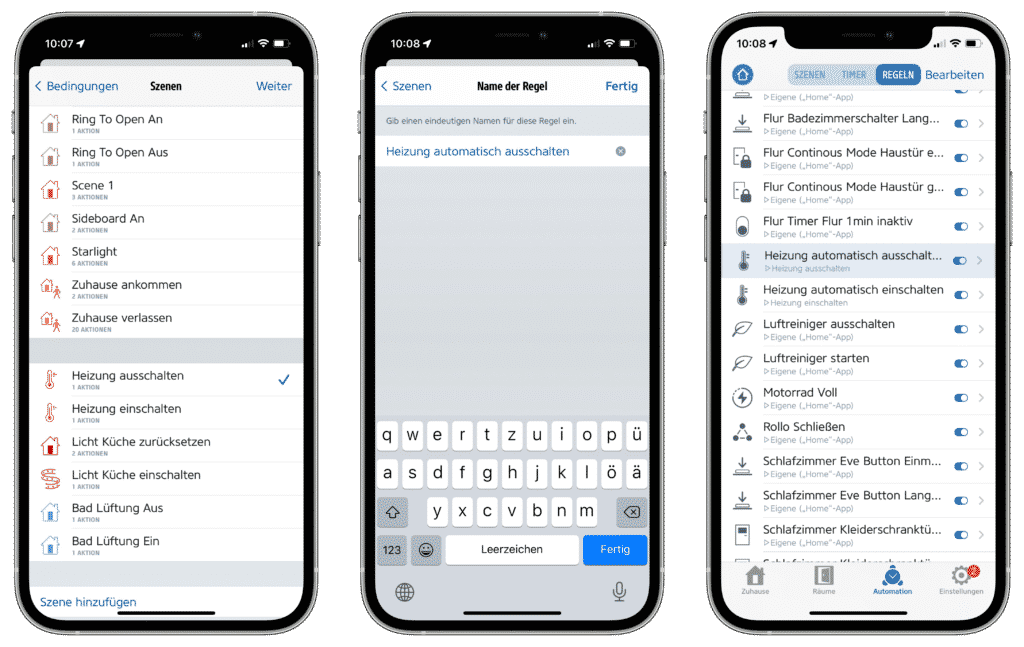
In the next step we go to “Add scene” at the very bottom and set the target temperature of our heater to 24 °C. As scene name we assign “Switch on heating”.
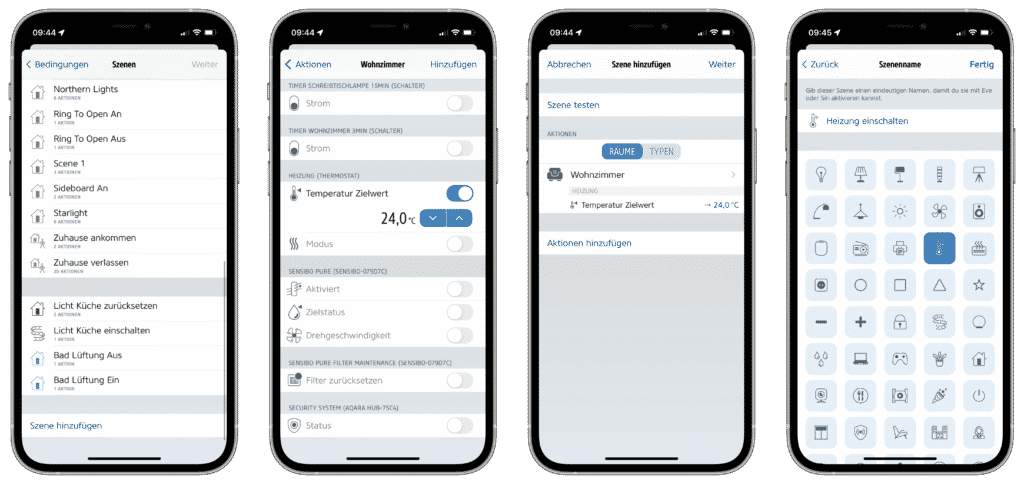
Via “Next” we still have to assign a name to our automation. We decide to “Switch on heating automatically” and with “Done” the automation is created and activated.
This means that the heating is already switched on as soon as our desired temperature range is undershot and the heating has not currently been switched off via one of our schedules or the presence detection.
Switch off heating automatically
To ensure that the heating is also automatically switched off when our desired temperature range is exceeded, we add another rule.
We also use the external temperature sensor as a trigger in this case, namely when it measures a temperature above our desired range. We can skip the conditions this time.
Then we add a new scene in which we set the temperature of the heater to 18.5 °C. We assign “Switch off heating” as the name of the scene.
As a name for the HomeKit automation we enter “Turn off heating automatically”.
As soon as the desired temperature range is exceeded, HomeKit now also automatically regulates the heating down. With this, we control the heating depending on a freely placeable temperature sensor and still consider schedules as well as presence detection.
Leave a Reply