
The dry heated air in the winter months is quite a nuisance for our bodies. But thanks to HomeKit, you can quickly remedy this situation. A compatible humidifier, a humidity sensor and two automations are enough to ensure optimal humidity even in winter. With iOS 15.1 and the new value-based triggers, the automations can even be created directly via Apple’s Home app. We’ll show you how it works step-by-step in this Automation of the Week.
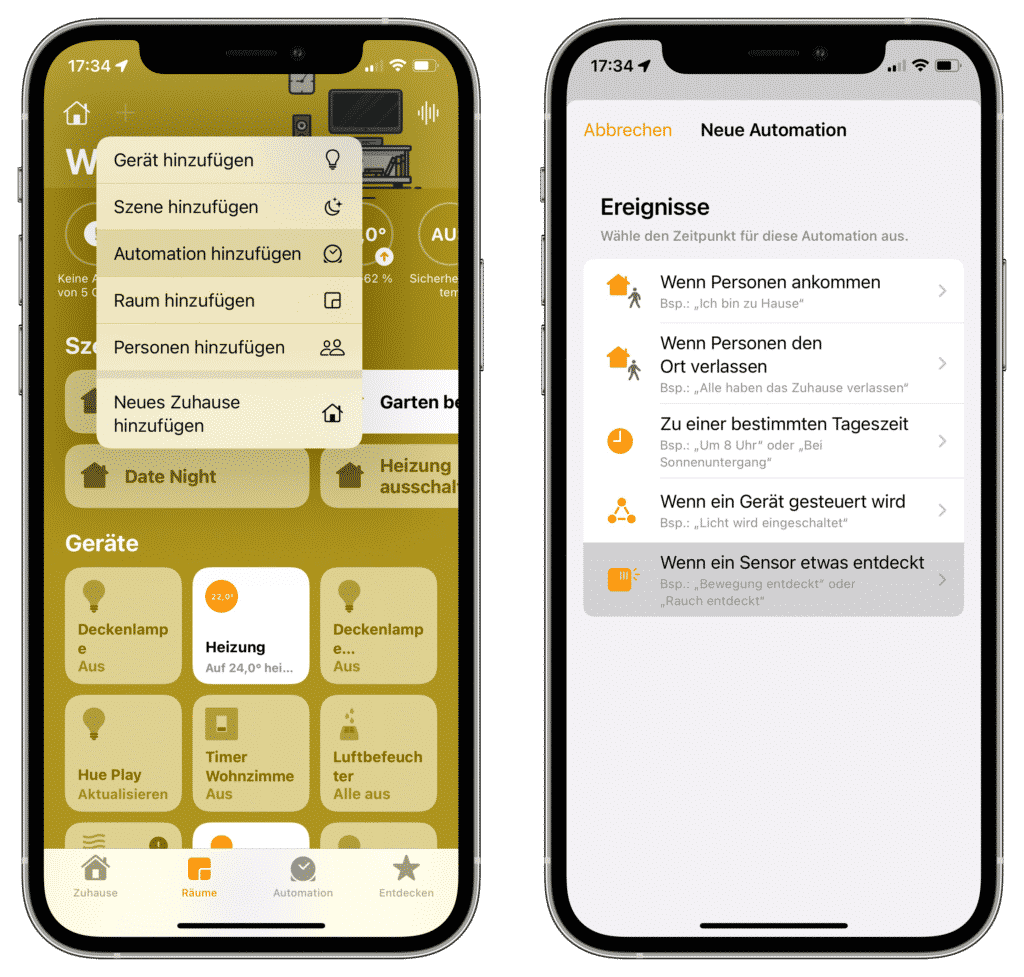
We open Apple’s Home app and create a new automation. We select “When a sensor detects something” as the trigger.
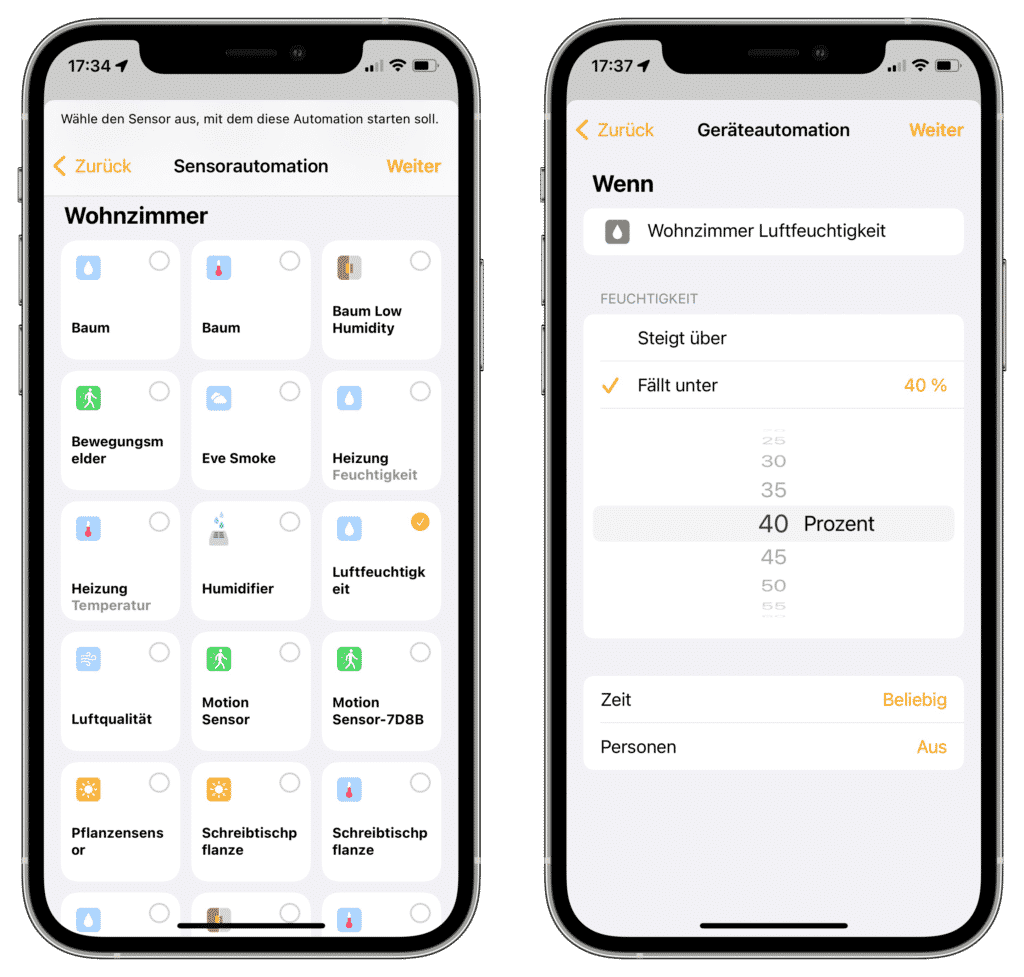
Then we select the humidity sensor, check the “Falls below” box and set the value to 40%. A healthy humidity level in living spaces is approximately between 40% and 60%.
We then select the humidifier as the device and turn it on at 75%. Depending on the size of the room, you can of course also start the device with about 50% or 100%. Click Done to create and activate the automation.

So that the humidifier is also switched off again automatically, we create another automation. Again, we use “When a sensor detects something” as the trigger.

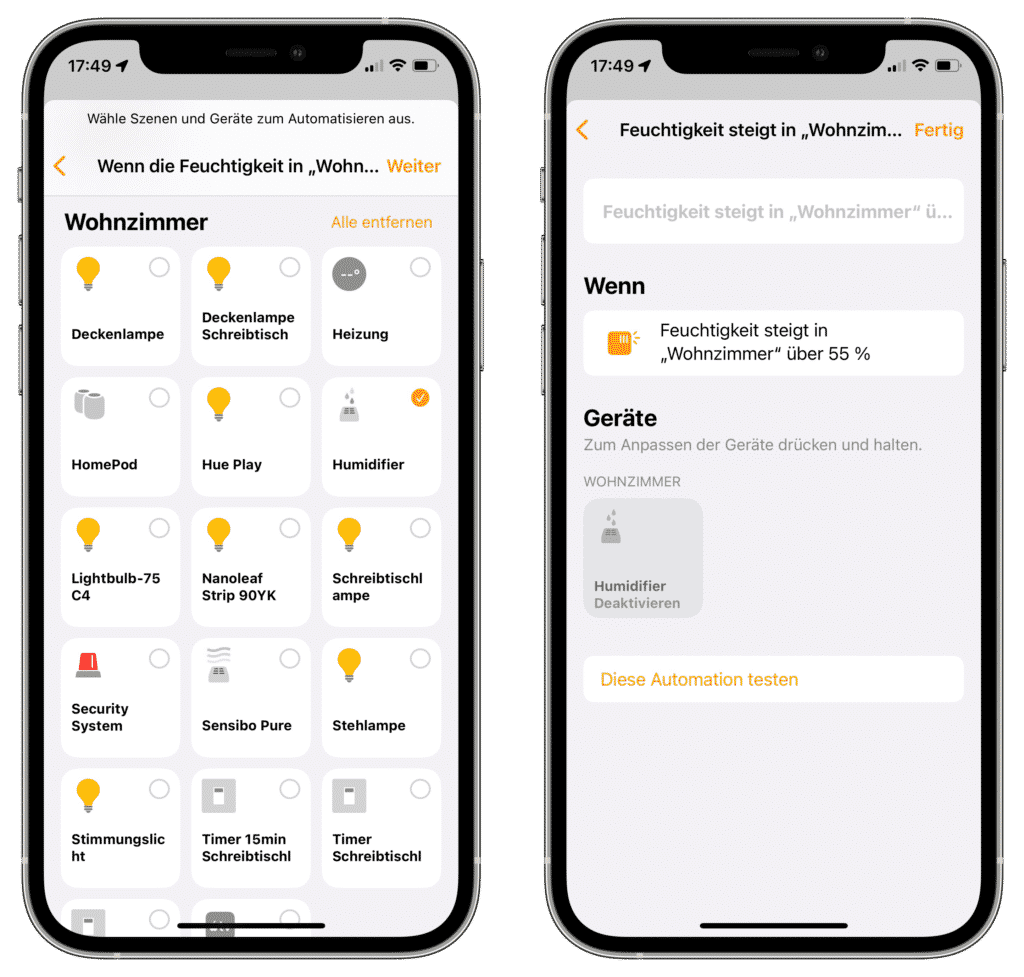
We select the humidity sensor again, but this time leave the selection at “Rises above”. We set the value to 55% so that the humidity does not become too high.

Then we select the humidifier and turn it off. Via “Done” this automation is also created and activated.
This means that the humidifier is automatically switched on as soon as the humidity becomes too low and switches itself off again when the value has normalized. In our device overview you can find HomeKit-enabled humidifiers as well as humidity sensors.
Leave a Reply